As a homeowner, one of the essential skills you should possess is the ability to replace cracked, broken, or missing roof tiles. Neglecting this task can lead to a host of issues, including the growth of moss and algae or even the nightmare scenario of a roof leak. Water seeping through your roofline can cause severe structural damage if left unaddressed.
While replacing tiles on your roof may seem like a daunting challenge, especially if you’re new to DIY projects or uncomfortable working at heights, fear not. This guide is here to help you navigate through the process with ease. We’ll discuss common signs that indicate a roof tile needs replacing, the necessary tools and equipment required for the job, and step-by-step instructions for replacing various types of roof tiles.
Signs that Indicate Roof Tile Replacement
Before diving into the specifics of how to replace roof tiles, it’s important to be able to identify when it’s time for replacement. Here are some tell-tale signs that your roof tiles may need attention:
1. Cracked or Broken Tiles
Inspect your roof visually from ground level or using binoculars. Look out for any cracked or broken tiles, as these are clear indicators that they need immediate replacement.
2. Missing Tiles
If you notice any gaps on your roof where tiles should be, it means you have missing tiles. It’s crucial to address this issue promptly since missing tiles leave your home vulnerable to water damage.
3. Water Stains on Ceilings
Water stains appearing on your ceilings are an obvious sign that water is penetrating through damaged tiles and reaching inside your home. If left unresolved, this can lead to more significant problems such as mould growth and compromised structural integrity.
By keeping an eye out for these signs, you can catch potential roofing issues early on and take appropriate action before they escalate.
Tools and Equipment You’ll Need
Now that we’ve covered the signs of roof tile damage, let’s discuss the tools and equipment necessary to replace them. Before starting any roofing project, ensure you have the following items on hand:
1. Safety Gear
Safety should always be a top priority when working at heights. Make sure you have sturdy footwear, a hard hat, safety goggles, and gloves to protect yourself throughout the process.
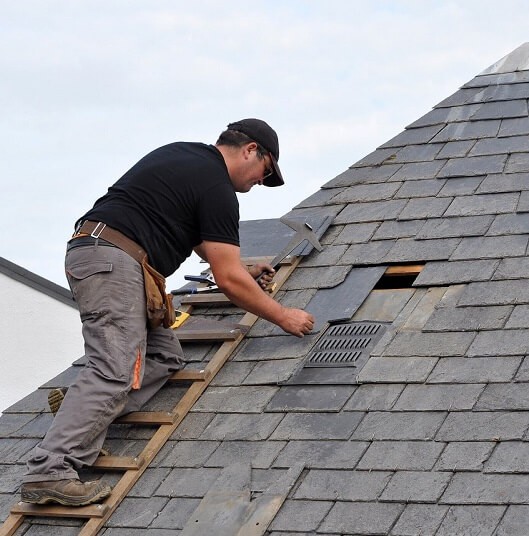
2. Ladder
A stable ladder that can reach the height of your roof is essential for accessing the damaged tiles safely. Ensure your ladder is in good condition and placed securely on level ground.
3. Roofing Hammer
A roofing hammer, also known as a slate ripper or tile ripper, is specifically designed for removing roof tiles without causing unnecessary damage to surrounding tiles.
4. Replacement Tiles
Have replacement tiles ready before you begin the project. It’s advisable to purchase extra tiles to account for any future repairs or replacements.
5. Chalk Line and Measuring Tape
These tools will assist you in accurately aligning new tiles and ensuring they fit seamlessly into place.
Having these tools readily available will make your roof tile replacement project more efficient and safer.
Steps for Replacing Common Roof Tile Types
In this section, we’ll provide step-by-step instructions for replacing three common types of roof tiles: clay tiles, concrete tiles, and asphalt shingles.
1. Clay Tiles
Clay tiles are durable and aesthetically pleasing but require careful handling during replacement to prevent breakage.
- Start by carefully removing any broken or cracked clay tiles using a roofing hammer.
- Slide the slate ripper under adjacent intact tiles to loosen them.
- Gently lift up the neighboring tiles from above while sliding out the damaged tile.
- Place a new clay tile into position, ensuring it aligns with the surrounding tiles.
- Press the new tile down firmly to secure it in place.
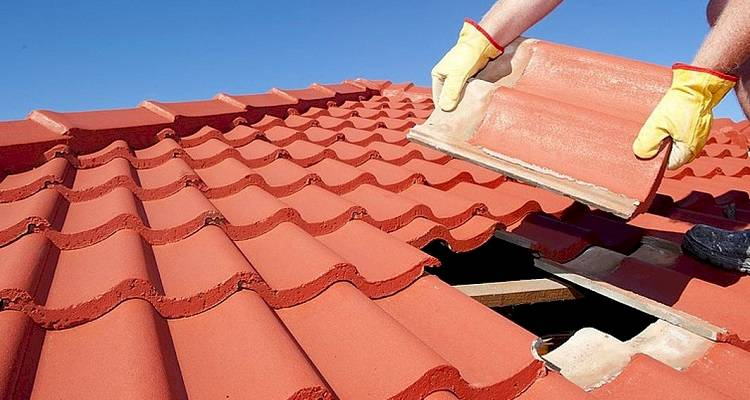
2. Concrete Tiles
Concrete tiles are a popular choice for their affordability and durability. Here’s how to replace them:
- Using a roofing hammer, break the damaged concrete tile into smaller pieces for easier removal.
- Lift up the surrounding tiles using the slate ripper, being careful not to damage them.
- Remove any remaining debris from the area where the new tile will be placed.
- Slide the replacement concrete tile into position, ensuring it fits snugly alongside neighboring tiles.
- Carefully press down on the new tile until it is securely seated.
3. Asphalt Shingles
Asphalt shingles are widely used due to their cost-effectiveness and ease of installation. Follow these steps to replace damaged asphalt shingles:
- Locate the damaged shingle by visually inspecting your roof or feeling for any loose or curled edges.
- Lift up the edges of the overlapping shingles using a pry bar.
- Remove any roofing nails securing the damaged shingle in place.
- Slide out the damaged shingle and discard it.
- Position a new asphalt shingle in its place, aligning it with neighboring shingles.
- Secure the new shingle with roofing nails, making sure they penetrate both the new shingle and underlying roof deck.
Conclusion
Replacing roof tiles is an essential skill every homeowner should possess, as neglecting this task can result in serious structural damage over time. By familiarizing yourself with common signs of roof tile damage, gathering necessary tools and equipment, and following step-by-step instructions for different types of roof tiles, you can confidently tackle this DIY project or make informed decisions when hiring a professional.
Remember that safety should always come first when working at heights, so take all necessary precautions before starting any roofing project. With proper care and attention, you can ensure your roof remains in excellent condition, protecting your home for years to come.